Engineers Garage

  • Electronic Projects & Tutorials
    • Electronic Projects
      • Arduino Projects
      • AVR
      • Raspberry pi
      • ESP8266
      • BeagleBone
      • 8051 Microcontroller
      • ARM
      • PIC Microcontroller
      • STM32
    • Tutorials
      • Audio Electronics
      • Battery Management
      • Brainwave
      • Electric Vehicles
      • EMI/EMC/RFI
      • Hardware Filters
      • IoT tutorials
      • Power Tutorials
      • Python
      • Sensors
      • USB
      • VHDL
    • Circuit Design
    • Project Videos
    • Components
  • Articles
    • Tech Articles
    • Insight
    • Invention Stories
    • How to
    • What Is
  • News
    • Electronic Product News
    • Business News
    • Company/Start-up News
    • DIY Reviews
    • Guest Post
  • Forums
    • EDABoard.com
    • Electro-Tech-Online
    • EG Forum Archive
  • DigiKey Store
    • Cables, Wires
    • Connectors, Interconnect
    • Discrete
    • Electromechanical
    • Embedded Computers
    • Enclosures, Hardware, Office
    • Integrated Circuits (ICs)
    • Isolators
    • LED/Optoelectronics
    • Passive
    • Power, Circuit Protection
    • Programmers
    • RF, Wireless
    • Semiconductors
    • Sensors, Transducers
    • Test Products
    • Tools
  • Learn
    • eBooks/Tech Tips
    • Design Guides
    • Learning Center
    • Tech Toolboxes
    • Webinars & Digital Events
  • Resources
    • Digital Issues
    • EE Training Days
    • LEAP Awards
    • Podcasts
    • Webinars / Digital Events
    • White Papers
    • Engineering Diversity & Inclusion
    • DesignFast
  • Guest Post Guidelines
  • Advertise
  • Subscribe

How to measure the turbidity in water using Arduino

By Usman ali Butt April 19, 2021

In this tutorial, we’ll learn how to measure the turbidity in water by using a sensor with Arduino. Turbidity refers to the relative clarity of a liquid. It’s a measure of the suspension of heavy particles, dust, and other matters (liquid/solid) that may leave water cloudy, unclear, or dense.

For example, a heavy concentration of salt, clay, magnesium, or other substances can lead to increased turbidity in a body or sample of water.

Scientifically, turbidity is typically expressed as total suspended solids or TSS in water. TSS are particles bigger than 10 microns that are dissolved in water. Particles smaller than the TSS size are known as suspended solids. Both contribute to the turbidity in water.

How to measure turbidity?
Both TSS and suspended solid particles reflect light. So, it’s possible to use the reflected light from a light source to calculate the turbidity of a sample of water. The greater the reflection of light, the greater the turbidity in the water and vice versa.

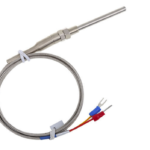
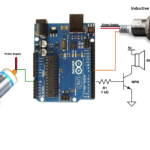
A simple LED and LDR (light-dependent resistor) are adequate for this project. The sensors and measuring principle are depicted in this image…

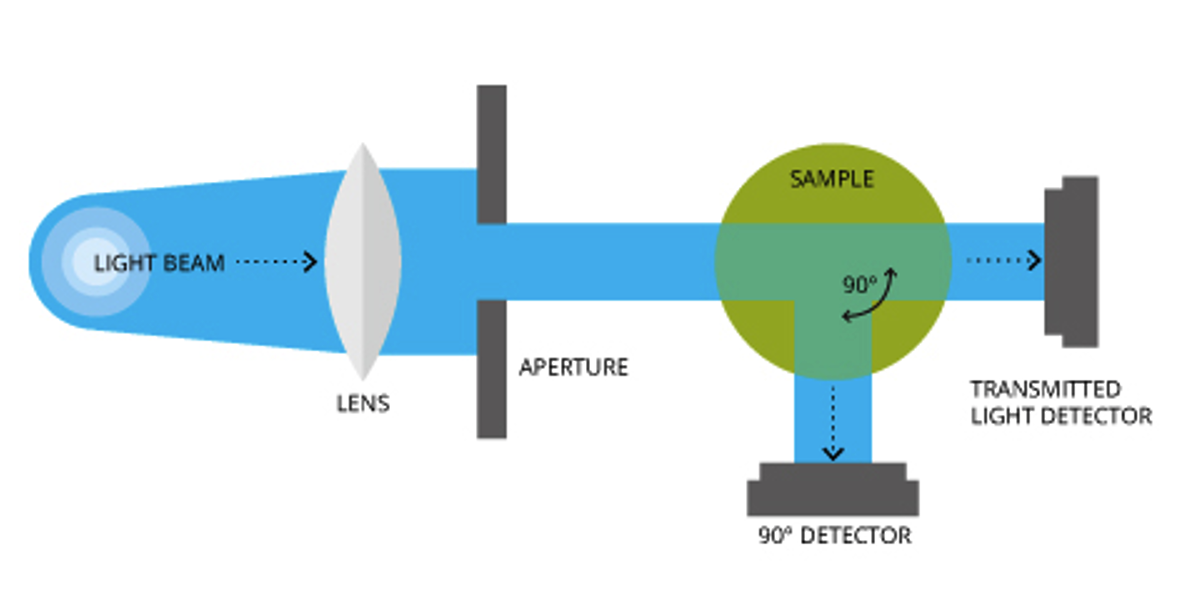
Using an LED and LDR might sound ideal for building a do-it-yourself (DIY) sensor. However, adjusting the required parameters and values of each of these components can be challenging since their sensitivity level is significant. It should not change, regardless of the conditions.

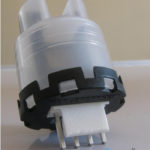
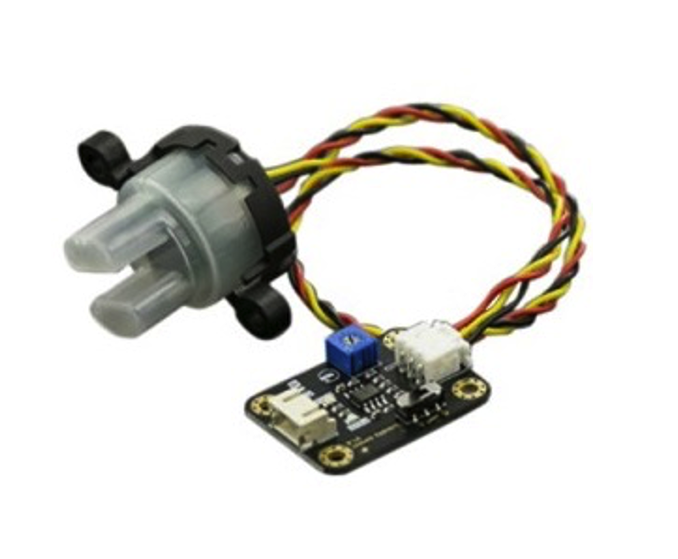
Therefore, it’s easier to use an industrial DIY sensor. We chose the DFRobots’ turbidity sensor for this project.

This sensor kit pinout and operation is similar to many of Arduino’s kits. For example, the digital and analog signal the output. The analog output corresponds to the actual quantity and the digital output is only available after the quantity surpasses a certain threshold.

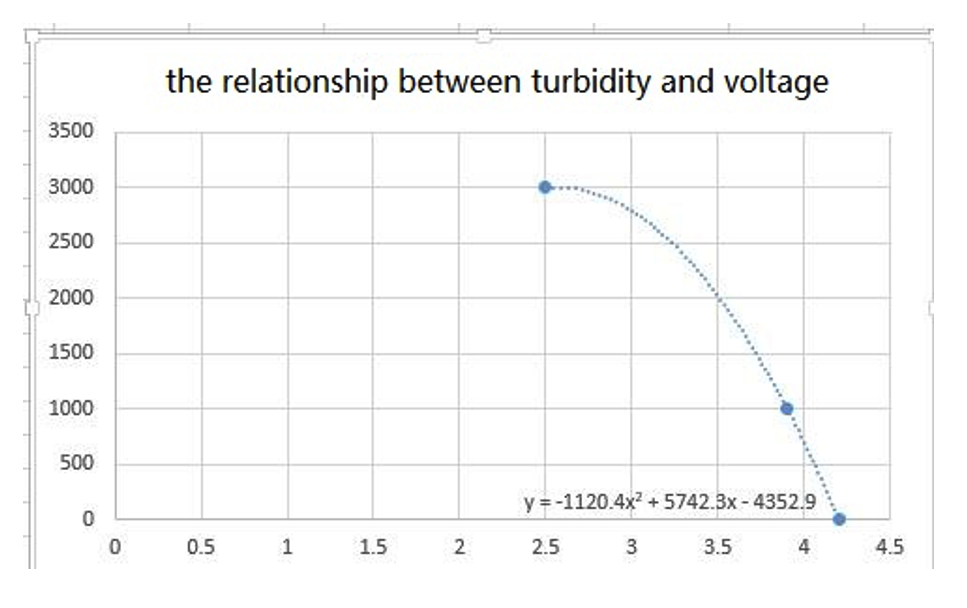
The relationship between the turbidity and voltage for the DFRobots sensor is depicted below. At 2.5 volt, the turbidity is 3000 NTU. It decreases as the voltage output increases. When it hits approximately 4.25 volts, it becomes 0.

The graph’s polynomial function is also given in the data sheet. Representing this polynomial in Arduino’s code, however, is complex.

The code
First, the serial monitor of Arduino is initialized at 9600bps. In the main loop, the Arduino ADC pin #0 reads the analog value that’s output by the sensor, converting it to Arduino’s 0-5v operating range. The next few statements are else/if checks that reflect the range of potential turbidity.

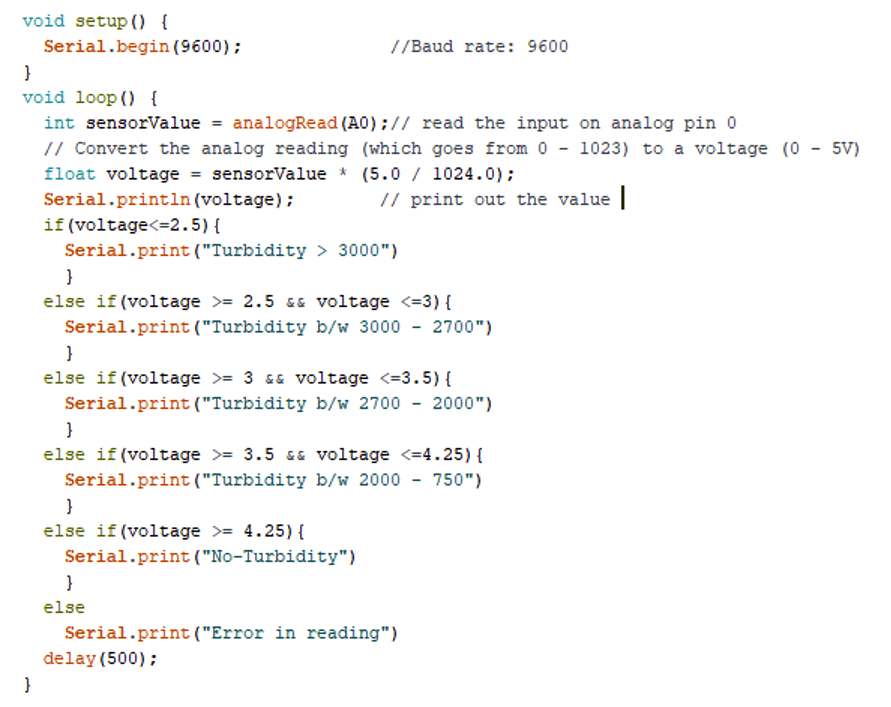
You’ll note that a half-second delay is inserted at the end, which serves to stabilize the sensor.
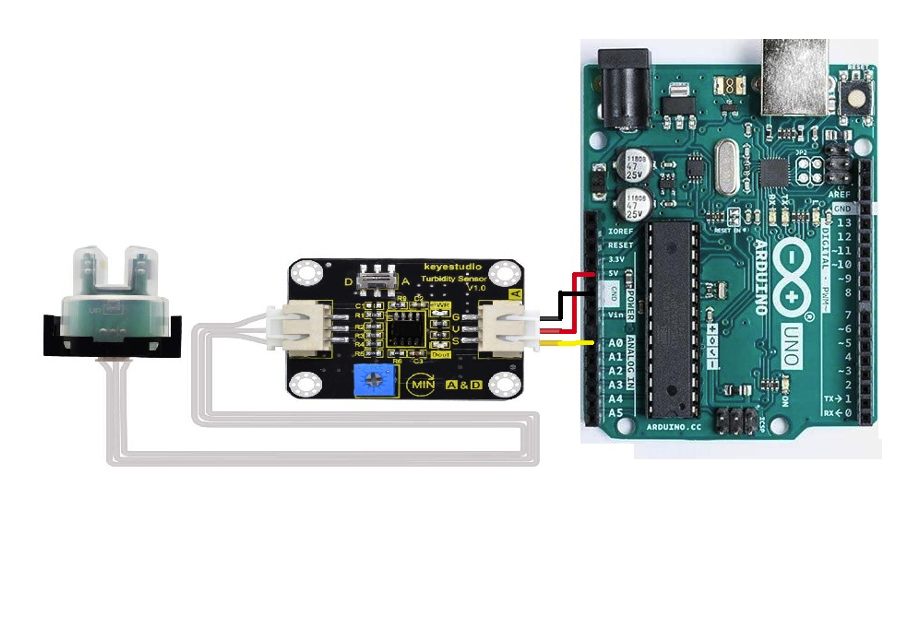
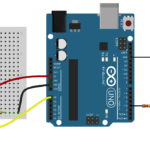
Circuit diagram
The circuit diagram of the sensor is fairly straightforward. The sensor is powered by 5v of Arduino’s regulator output. Arduino’s analog pin #0 captures the sensor output.

Where to purchase the parts?

  • Mouser: The turbidity sensor
  • Mouser: Arduino UNO


You may also like:


  • Insight – Learn the Working of a Turbidity Sensor

  • How to use a flex sensor with Arduino

  • What are the different types of temperature sensors and their…

  • How to build a metal detector using an inductive proximity…

Filed Under: Microcontroller Projects
Tagged With: ardino, dfrobots
 

Next Article

← Previous Article
Next Article →

Questions related to this article?
👉Ask and discuss on Electro-Tech-Online.com and EDAboard.com forums.


Tell Us What You Think!! Cancel reply

You must be logged in to post a comment.

EE TECH TOOLBOX

“ee
Tech Toolbox: Internet of Things
Explore practical strategies for minimizing attack surfaces, managing memory efficiently, and securing firmware. Download now to ensure your IoT implementations remain secure, efficient, and future-ready.

EE Learning Center

EE Learning Center
“engineers
EXPAND YOUR KNOWLEDGE AND STAY CONNECTED
Get the latest info on technologies, tools and strategies for EE professionals.

HAVE A QUESTION?

Have a technical question about an article or other engineering questions? Check out our engineering forums EDABoard.com and Electro-Tech-Online.com where you can get those questions asked and answered by your peers!


RSS EDABOARD.com Discussions

  • Voltage mode pushpull is a nonsense SMPS?
  • Input impedance matching network
  • High Side current sensing
  • The comparison of different Tcl script checkers
  • Reducing "shoot-through" in offline Full Bridge SMPS?

RSS Electro-Tech-Online.com Discussions

  • Back to the old BASIC days
  • Parts required for a personal project
  • PIC KIT 3 not able to program dsPIC
  • Failure of polypropylene motor-run capacitors
  • Siemens large industrial PLC parts

Featured – RPi Python Programming (27 Part)

  • RPi Python Programming 21: The SIM900A AT commands
  • RPi Python Programming 22: Calls & SMS using a SIM900A GSM-GPRS modem
  • RPi Python Programming 23: Interfacing a NEO-6MV2 GPS module with Raspberry Pi
  • RPi Python Programming 24: I2C explained
  • RPi Python Programming 25 – Synchronous serial communication in Raspberry Pi using I2C protocol
  • RPi Python Programming 26 – Interfacing ADXL345 accelerometer sensor with Raspberry Pi

Recent Articles

  • What is AWS IoT Core and when should you use it?
  • AC-DC power supply extends voltage range to 800 V DC
  • Infineon’s inductive sensor integrates coil system driver, signal conditioning circuits and DSP
  • Arm Cortex-M23 MCU delivers 87.5 µA/MHz active mode
  • STMicroelectronics releases automotive amplifiers with in-play open-load detection

EE ENGINEERING TRAINING DAYS

engineering

Submit a Guest Post

submit a guest post
Engineers Garage
  • Analog IC TIps
  • Connector Tips
  • Battery Power Tips
  • DesignFast
  • EDABoard Forums
  • EE World Online
  • Electro-Tech-Online Forums
  • EV Engineering
  • Microcontroller Tips
  • Power Electronic Tips
  • Sensor Tips
  • Test and Measurement Tips
  • 5G Technology World
  • Subscribe to our newsletter
  • About Us
  • Contact Us
  • Advertise

Copyright © 2025 WTWH Media LLC. All Rights Reserved. The material on this site may not be reproduced, distributed, transmitted, cached or otherwise used, except with the prior written permission of WTWH Media
Privacy Policy

Search Engineers Garage

  • Electronic Projects & Tutorials
    • Electronic Projects
      • Arduino Projects
      • AVR
      • Raspberry pi
      • ESP8266
      • BeagleBone
      • 8051 Microcontroller
      • ARM
      • PIC Microcontroller
      • STM32
    • Tutorials
      • Audio Electronics
      • Battery Management
      • Brainwave
      • Electric Vehicles
      • EMI/EMC/RFI
      • Hardware Filters
      • IoT tutorials
      • Power Tutorials
      • Python
      • Sensors
      • USB
      • VHDL
    • Circuit Design
    • Project Videos
    • Components
  • Articles
    • Tech Articles
    • Insight
    • Invention Stories
    • How to
    • What Is
  • News
    • Electronic Product News
    • Business News
    • Company/Start-up News
    • DIY Reviews
    • Guest Post
  • Forums
    • EDABoard.com
    • Electro-Tech-Online
    • EG Forum Archive
  • DigiKey Store
    • Cables, Wires
    • Connectors, Interconnect
    • Discrete
    • Electromechanical
    • Embedded Computers
    • Enclosures, Hardware, Office
    • Integrated Circuits (ICs)
    • Isolators
    • LED/Optoelectronics
    • Passive
    • Power, Circuit Protection
    • Programmers
    • RF, Wireless
    • Semiconductors
    • Sensors, Transducers
    • Test Products
    • Tools
  • Learn
    • eBooks/Tech Tips
    • Design Guides
    • Learning Center
    • Tech Toolboxes
    • Webinars & Digital Events
  • Resources
    • Digital Issues
    • EE Training Days
    • LEAP Awards
    • Podcasts
    • Webinars / Digital Events
    • White Papers
    • Engineering Diversity & Inclusion
    • DesignFast
  • Guest Post Guidelines
  • Advertise
  • Subscribe