Typically, a WiFi network has a range that’s above 45 meters. The signals are strongest near the router. The further away you move, the weaker the signal. The same is true of thick walls or additional floors in a home or building. The WiFi signals could be completely lost on other floors of a premise.
The number of active devices connected to the router can also impact the browsing speed. This has become more common with the increase in smart appliances and devices, which connect via WiFi to “talk” to one another or the home automation hub.
A common solution to this problem is using a range extender or WiFi repeater. A range extender boosts the WiFi signals by using built-in radios and antennas that pair wirelessly with the router. It’s possible to build a WiFi range extender using ESP8266 or ESP32. Both ESP boards are popular WiFi development platforms often used for IoT devices.
Older versions of ESP8266 or ESP32 can be converted into a WiFi a NAT router, which can then be used as a range extender. It can serve as a separate WiFi network with different SSID and password for guests or be converted into a corporate WiFi network or a regular network for simple devices.
A WiFi NAT router setup with ESP8266 or ESP32 delivers browsing speeds of greater than 15 Mbps. In this project, we’ll convert an ESP32 development board into a WiFi range extender.
The components
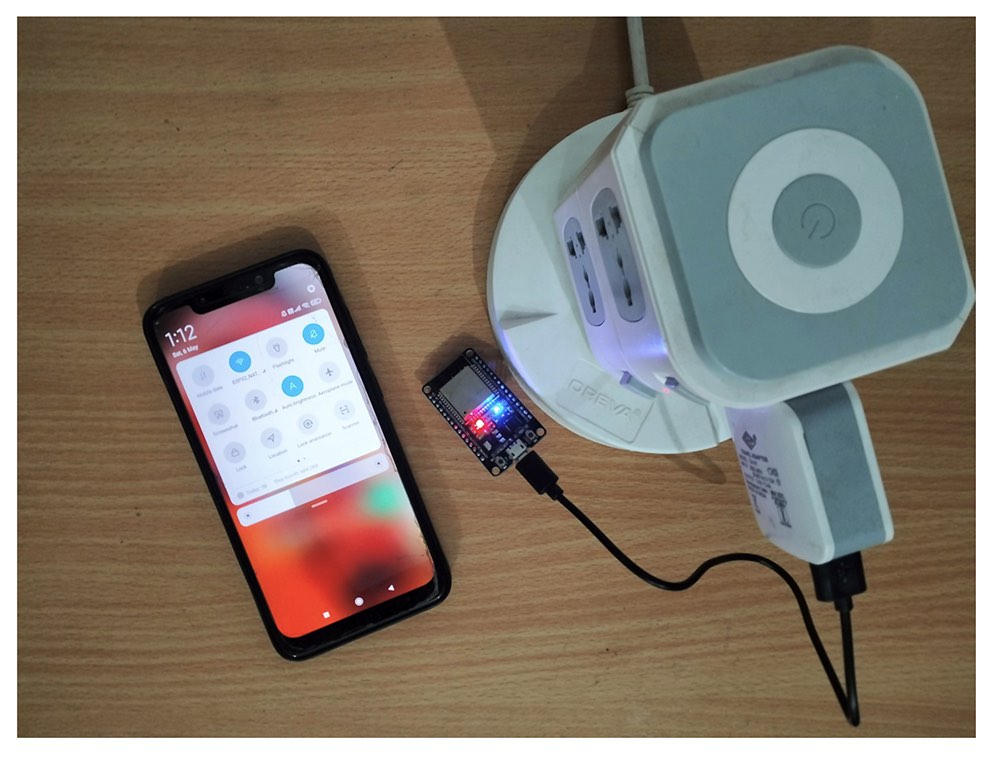
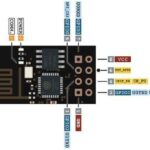
You’ll only need an ESP32 board to build the WiFi repeater and a PC to flash the new firmware. After loading the firmware, the router configurations can be set from a smartphone. You can also use a Micro-USB cable and power adaptor to keep the ESP32 WiFi repeater ON at all times once the WiFi repeater is built and configured properly.
Programming not required
Interestingly, you need not program the ESP32 to use it as an expander. There’s firmware available on the GitHub repository for creating the NAT router. Building this project simply requires loading the firmware to ESP32 and making the correct configurations.
The tools
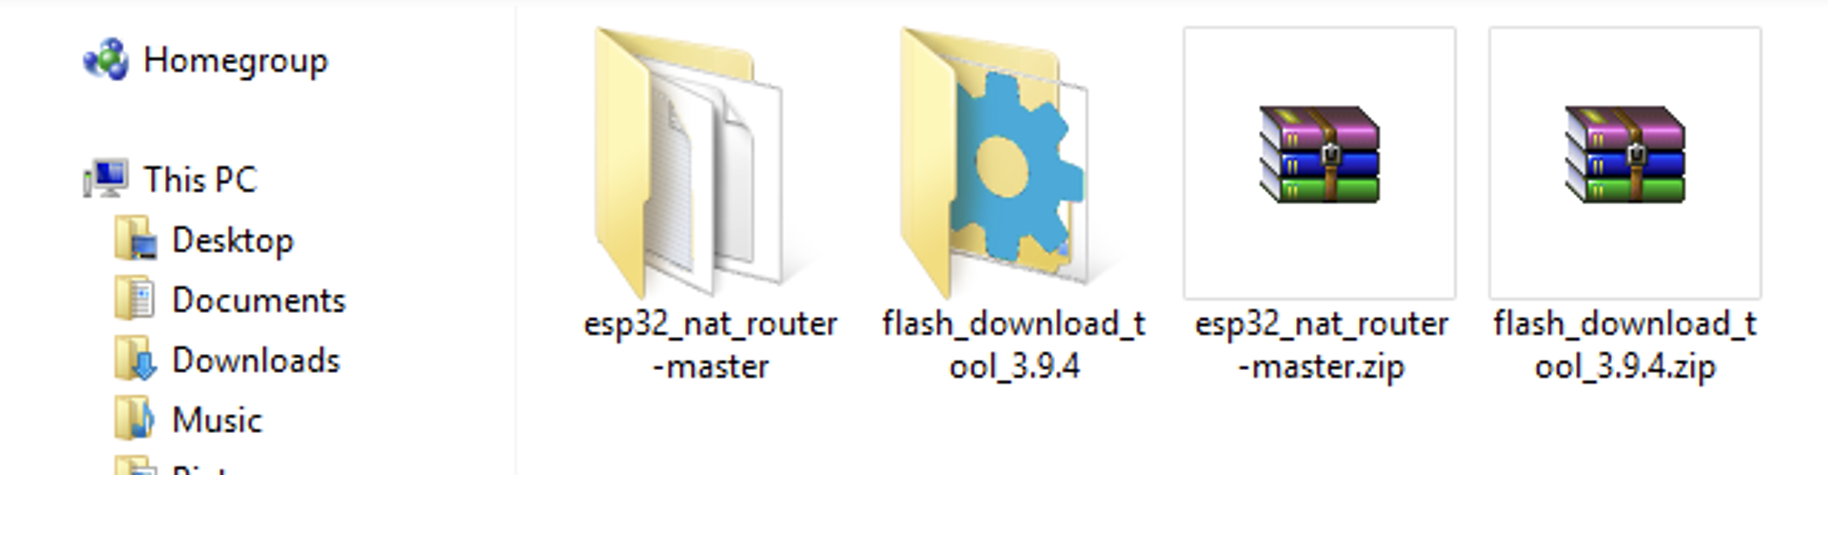
To build this project, install the ESP Flash Download Tool from Espressif website. The tool will download as a ZIP file. Unfortunately, it’s only available for Windows PC.
You’ll also need the firmware for the ESP32 NAT router, which can be downloaded from this GitHub link. Visit the link, click on the “Code” tab, and select “Download ZIP.” It will also download as a ZIP file. Unzip both flash download tools and the ESP32 NAT router firmware on your Windows PC.
Uploading the firmware
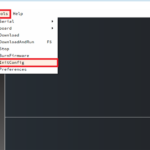
To upload the firmware to ESP32 from the Flash Download Tool, you msut run the executable as administrator. Open the Flash Download Tool folder and right-click on the executable file. Select “Run as administrator” from the drop-down menu.

From the pop-up window, choose the “ESP32” Chip Type and the “Develop” WorkMode.
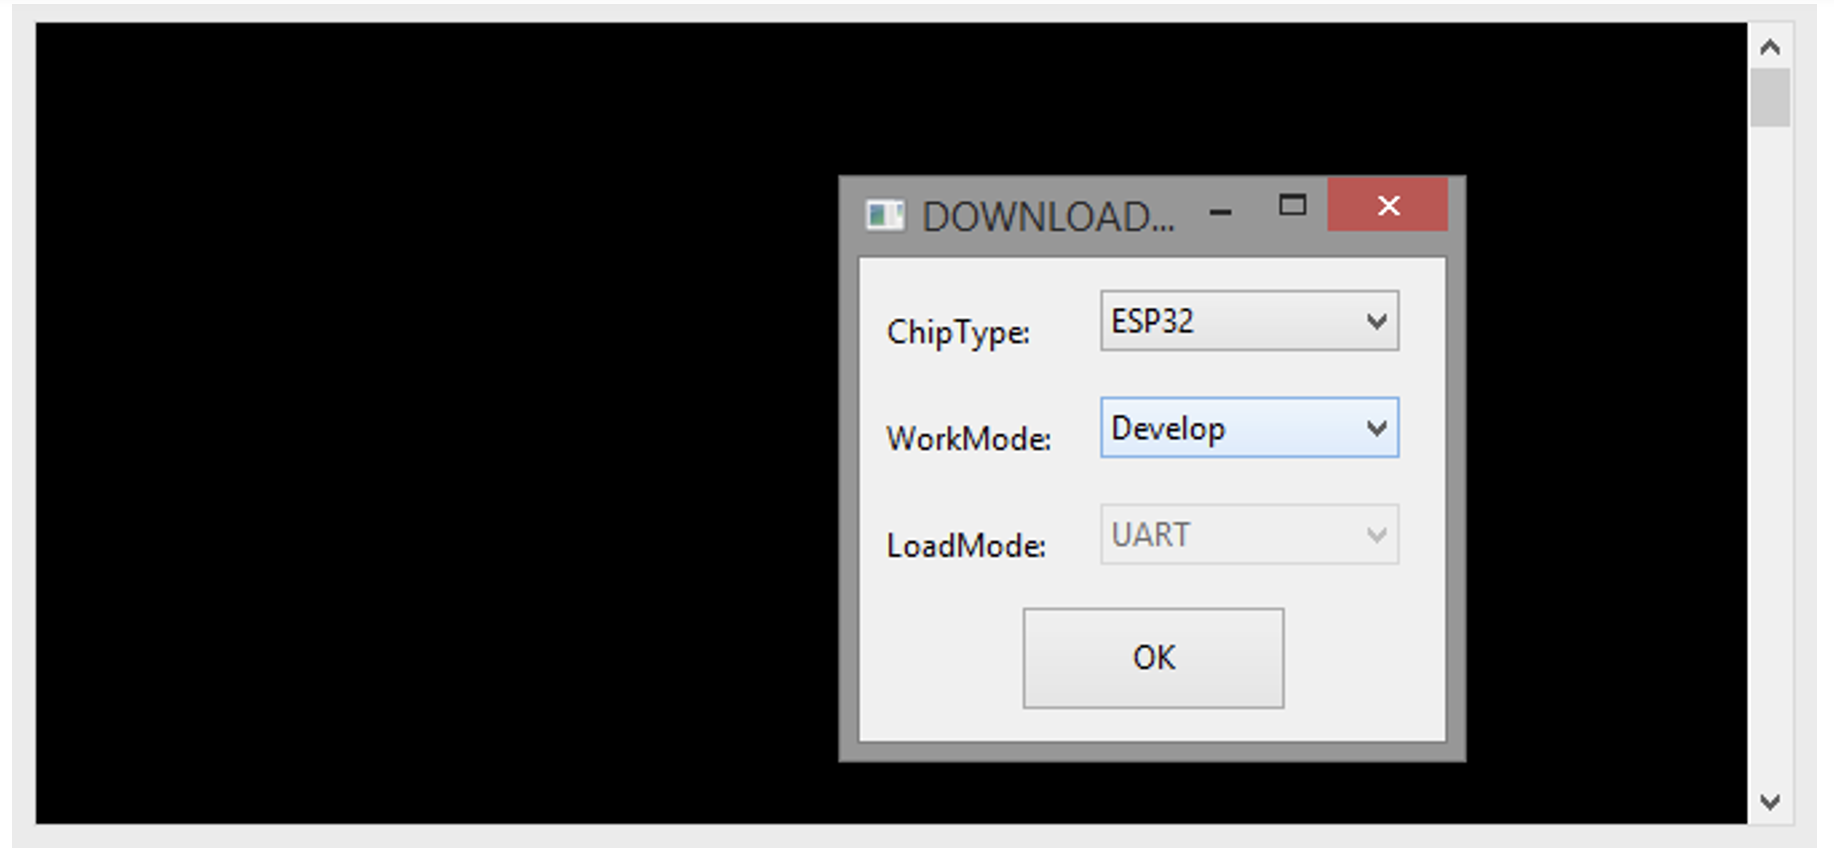
Click “OK,” and a window with the ESP32 Flash Download Tool will open.
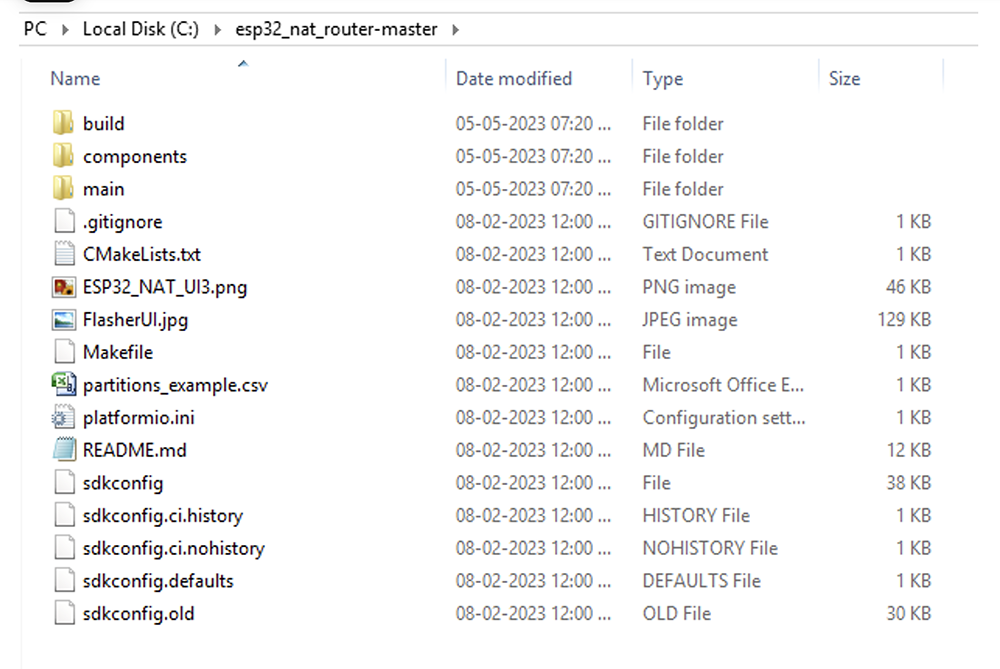
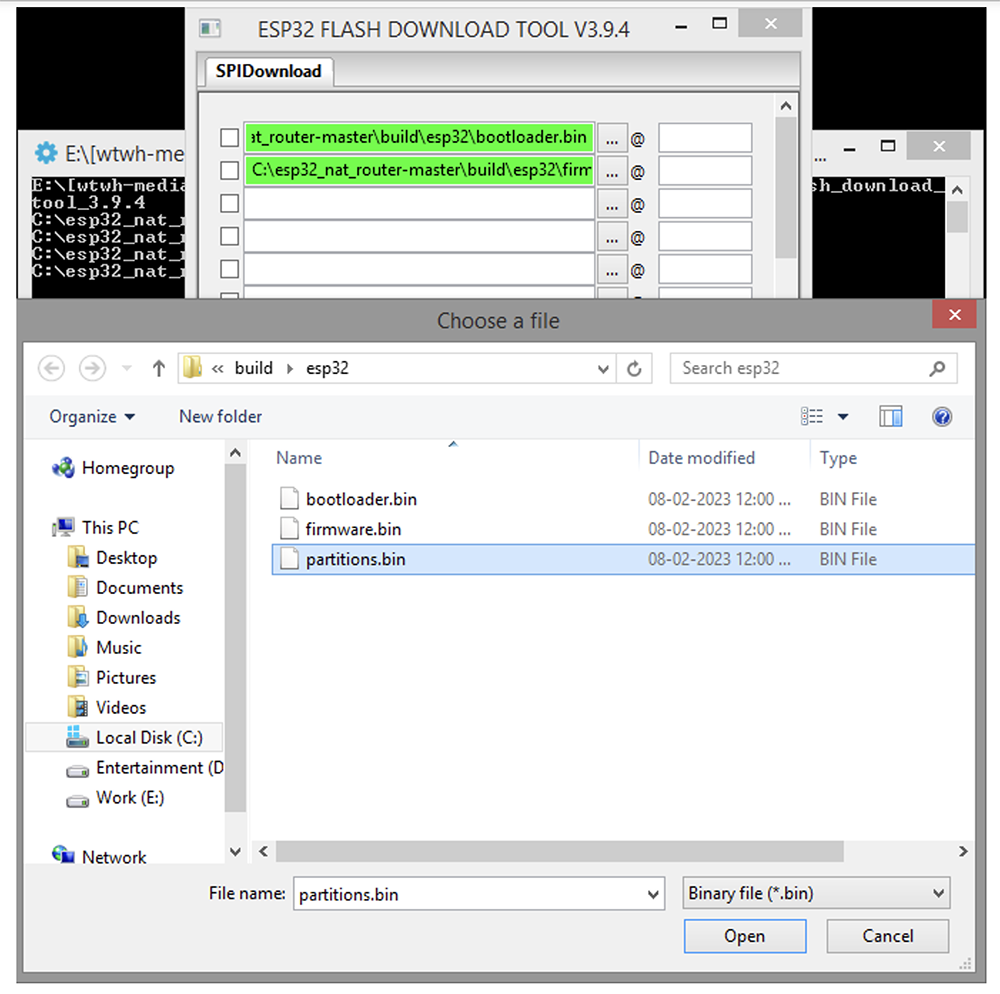
 Next, find the location of the firmware files. The build modules for ESP32 NAT firmware are in the ~\esp32_nat_router-master\build\esp32 folder.
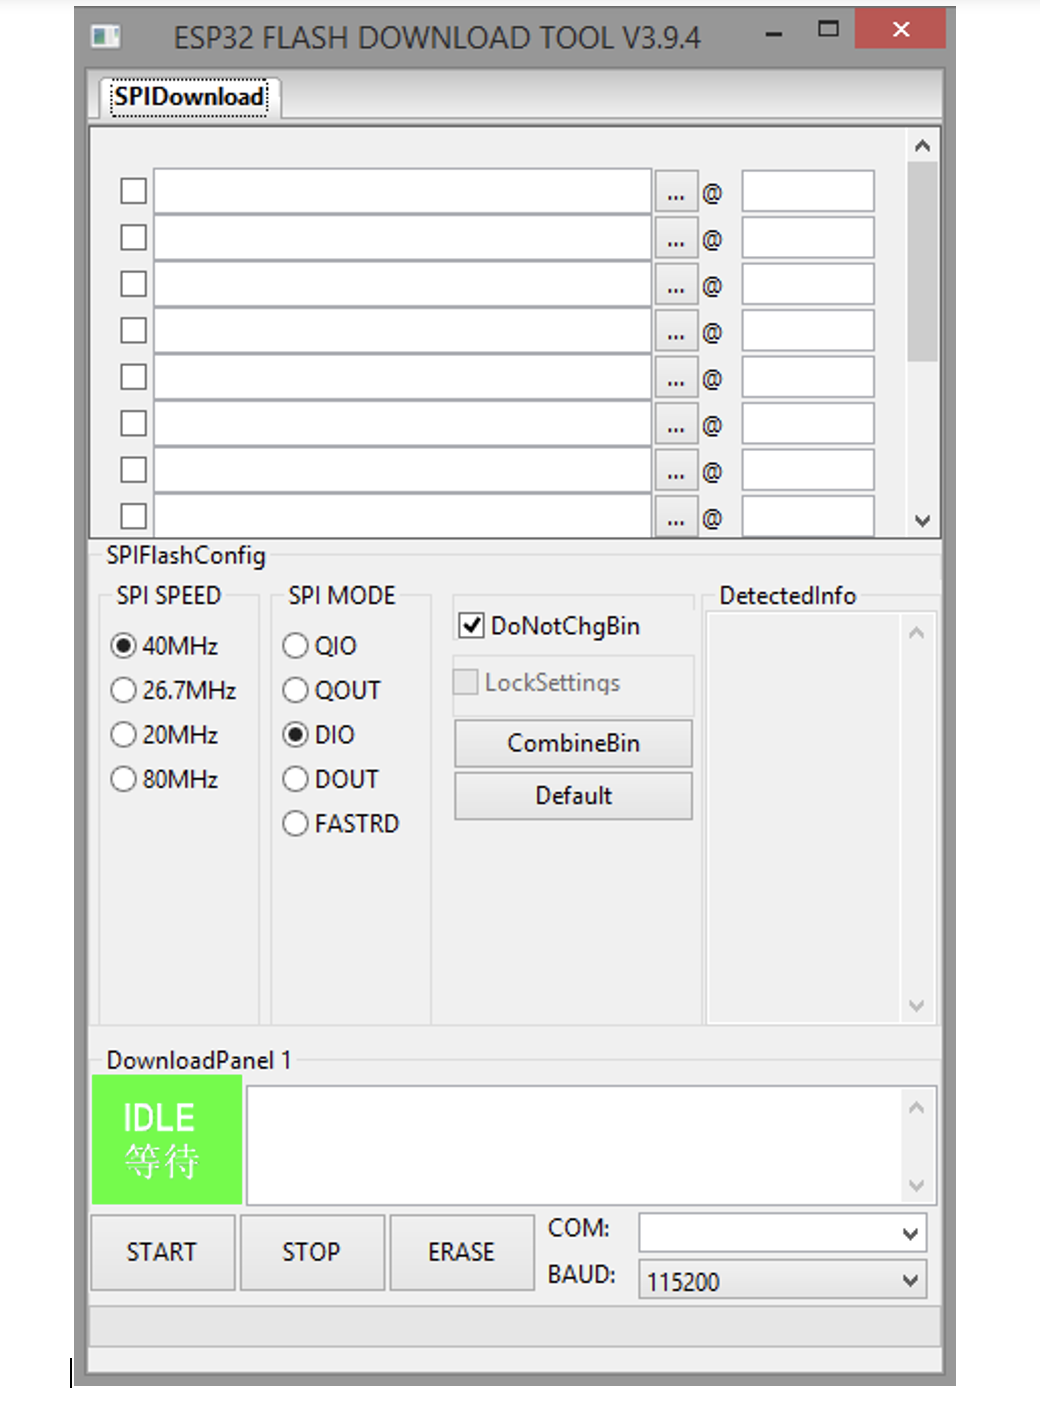
From the SPI download tab (in the Flash Download Tool), browse and load bootloader.bin. It should be in the first row. Follow suit and browse and load the firmware.bin and the partition.bin files (in the second and third rows).
 Next, you must specify the hex code, which indicates the storage location for each file in the flash memory. Assign 0x1000 to the bootloader.bin, 0x10000 to the firmware.bin, and 0x8000 to the partitions.bin. Remember to select the checkboxes before all three rows.
 Next, connect the ESP32 board to your PC through the Micro-USB cable. Select the COM port. Change the BAUD rate to 576000 bps. Leave the other settings (SPI SPEED and SPI MODE) as is.
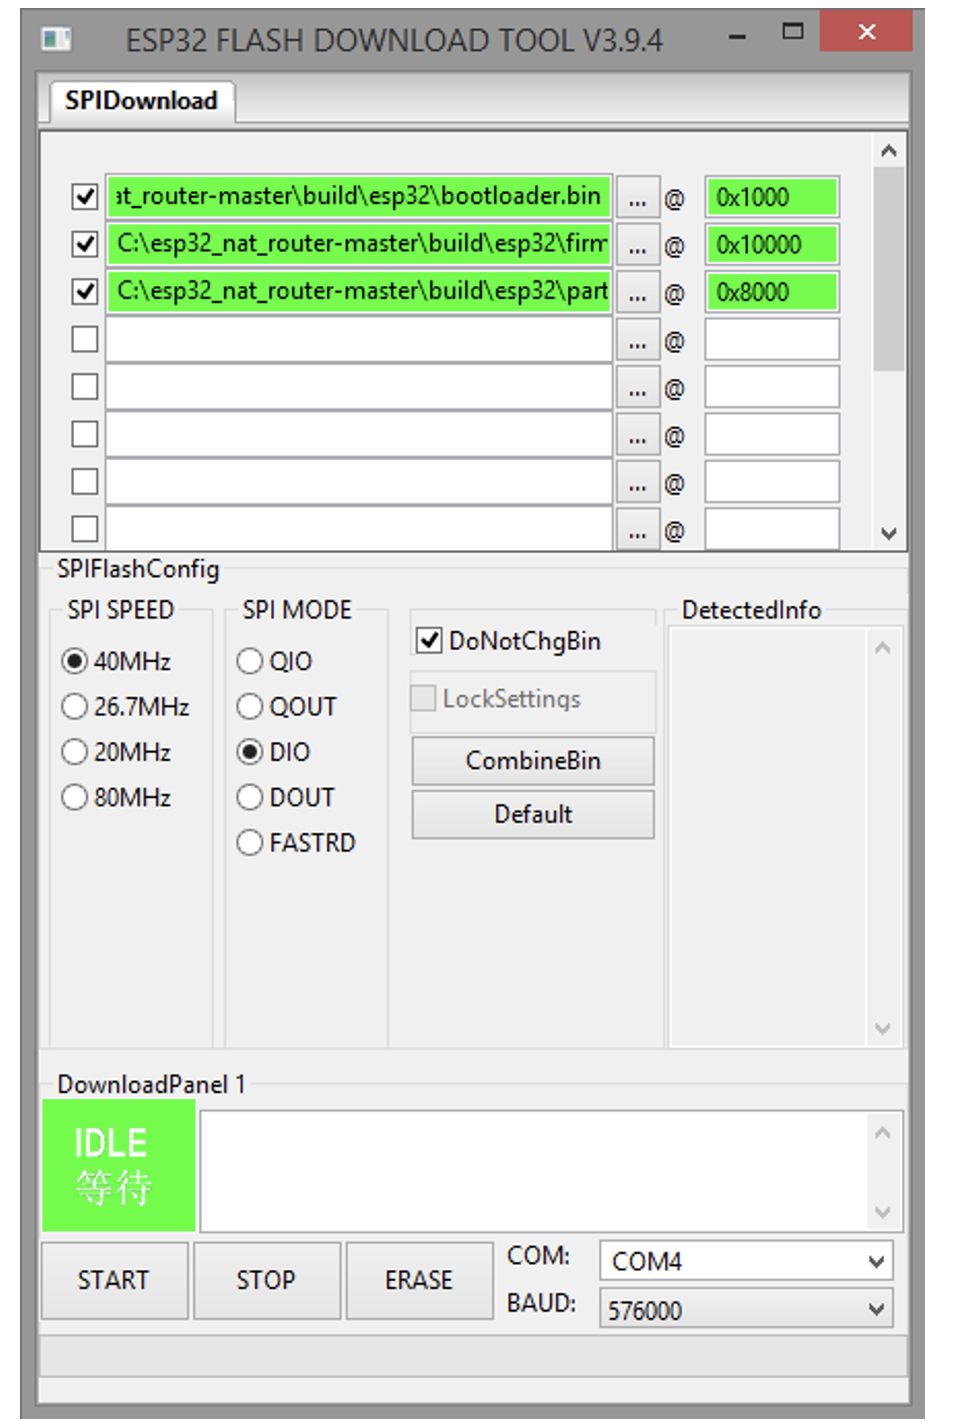
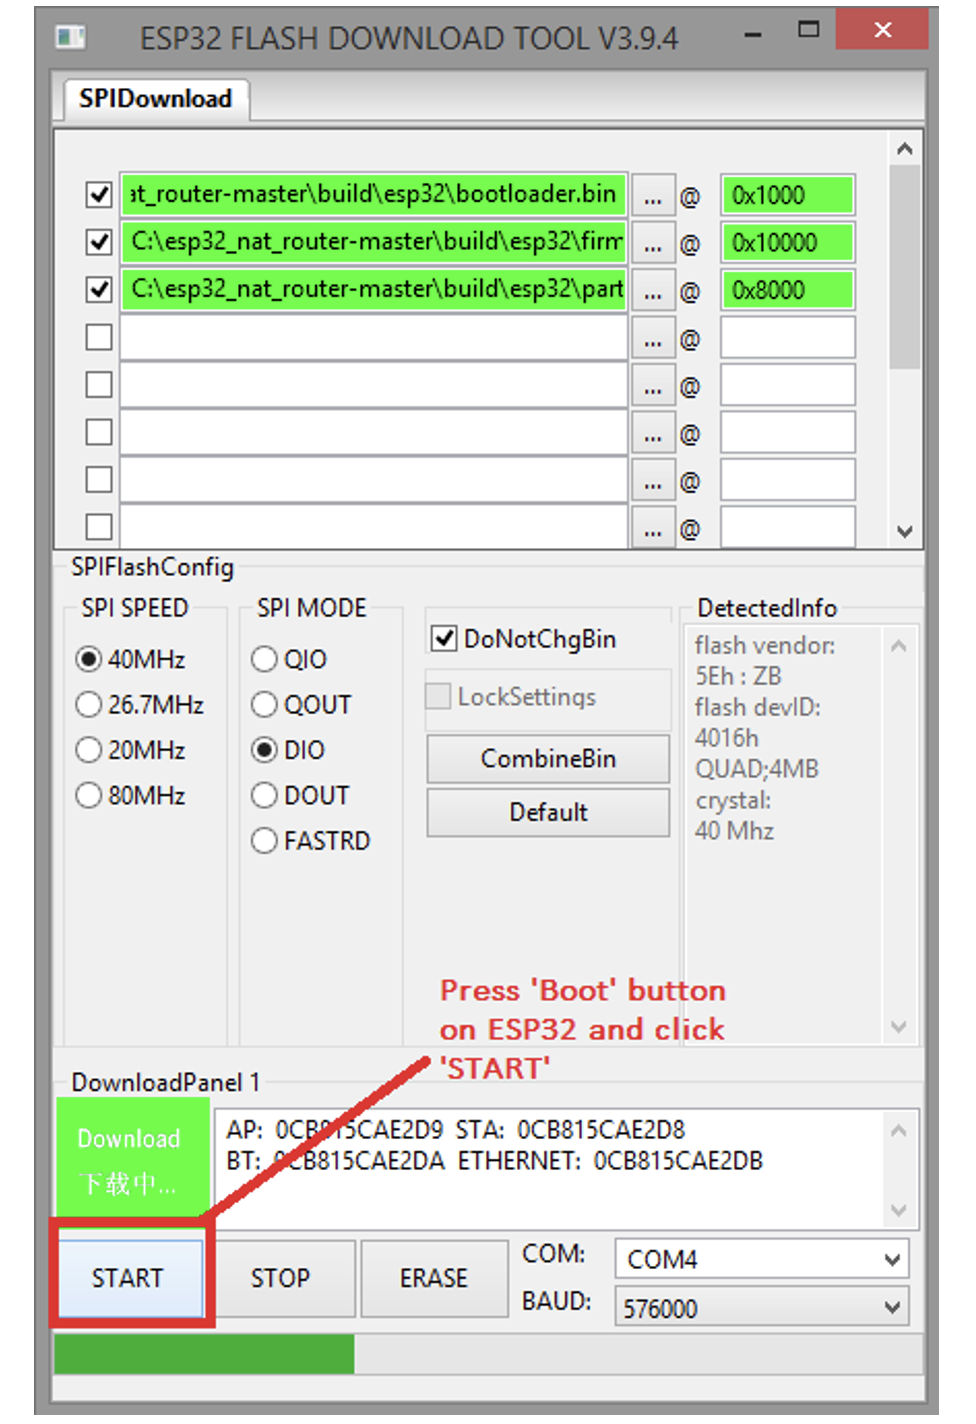
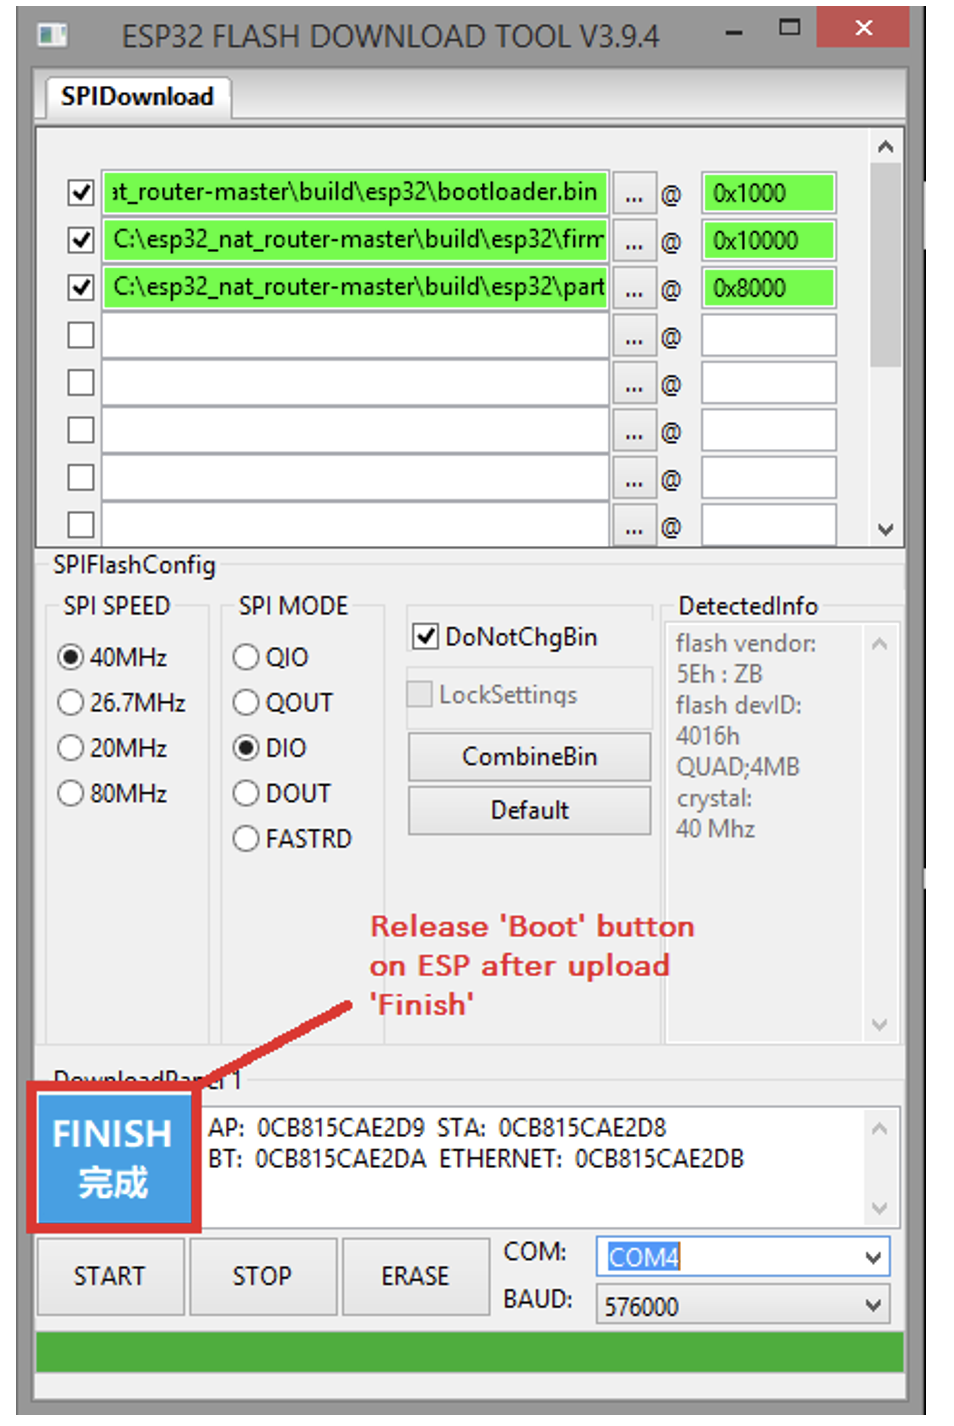
Press the boot button on ESP32 and click “START.” The firmware should flash on the board in a few seconds. Once, the firmware is loaded, release the boot button on ESP32. Unplug ESP32 and plug it back into the PC to restart the board.
 Configuring the WiFi repeater
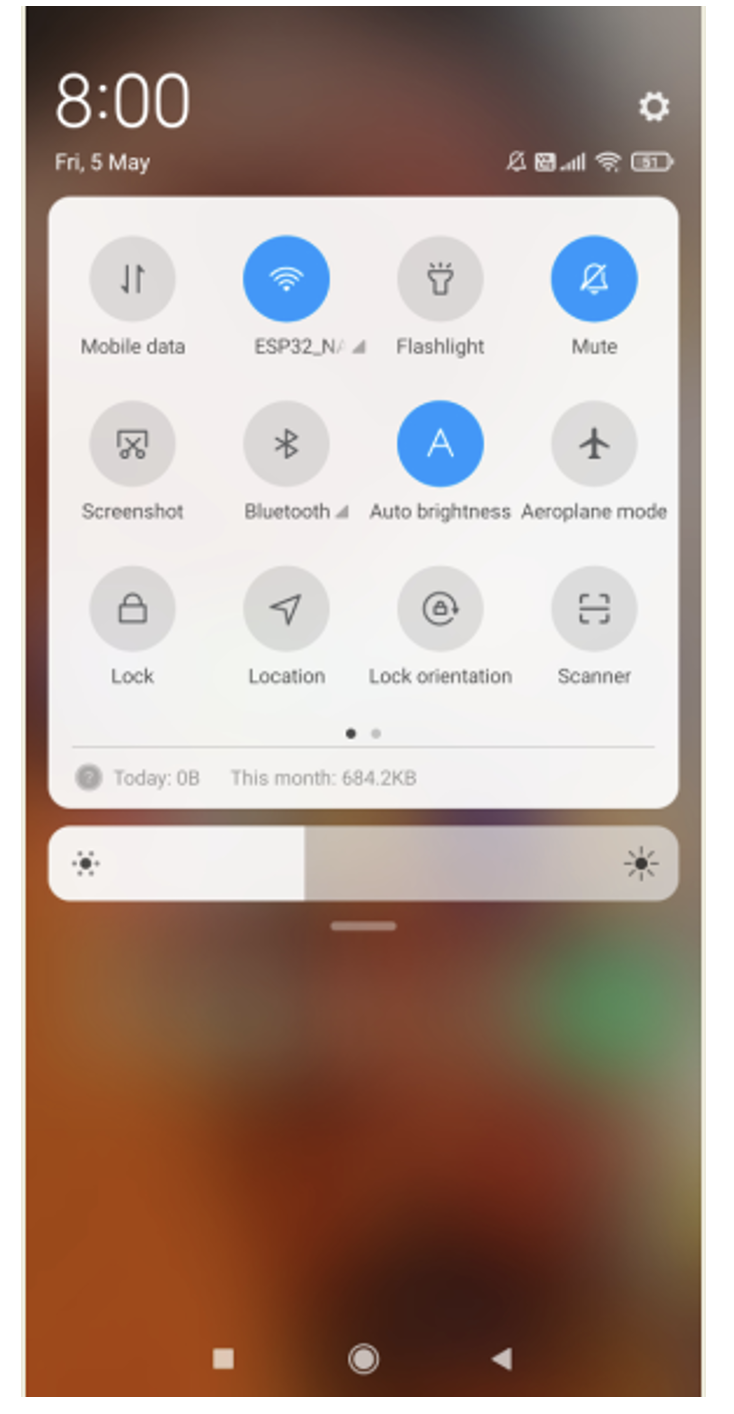
Now, it’s time to configure the ESP32 repeater. After unplugging and re-plugging, it will appear as one of the available WiFi networks. You should see “ESP32_NAT_Router.” The configuration of the router can be done from any device, including from the PC or a smartphone.
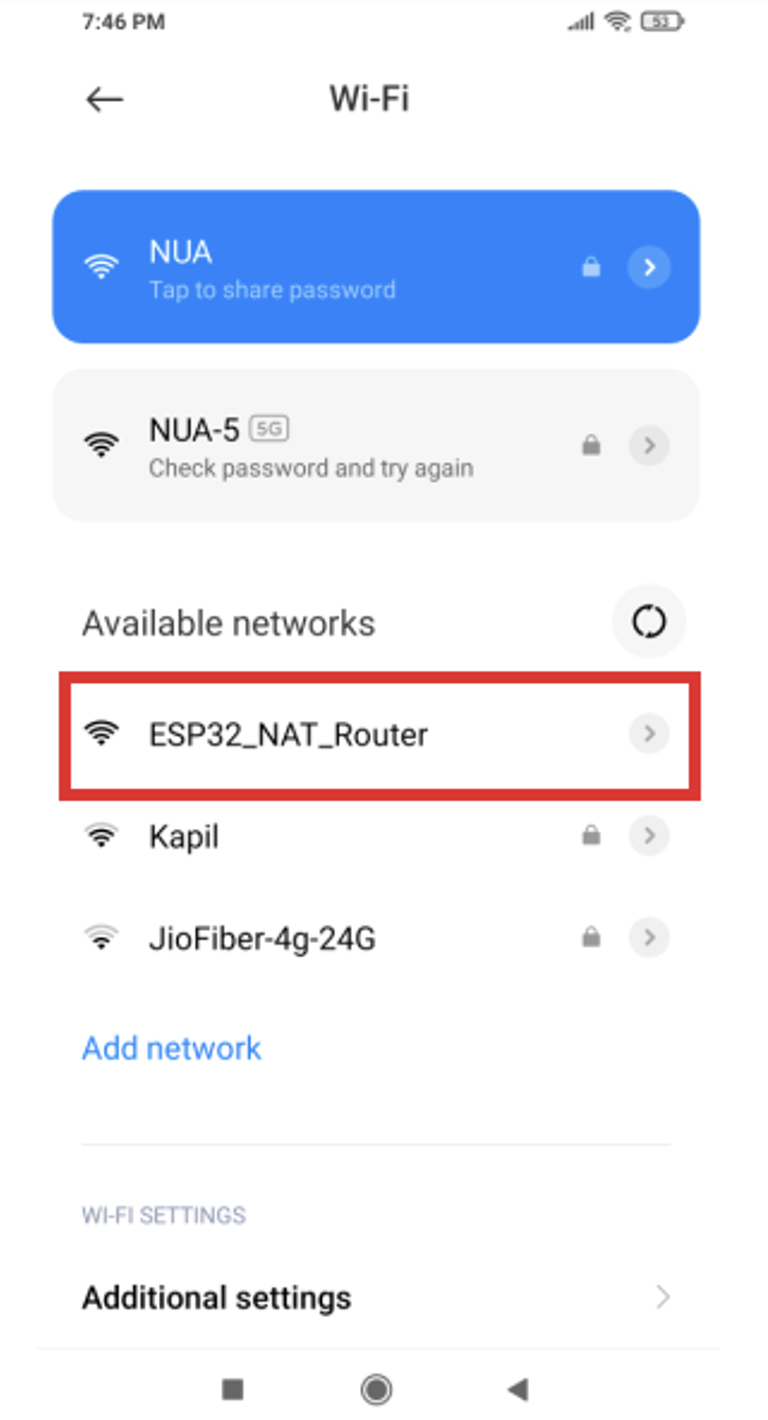
Connect to the “ESP32_NAT_Router” network from the WiFi settings of your PC or mobile.

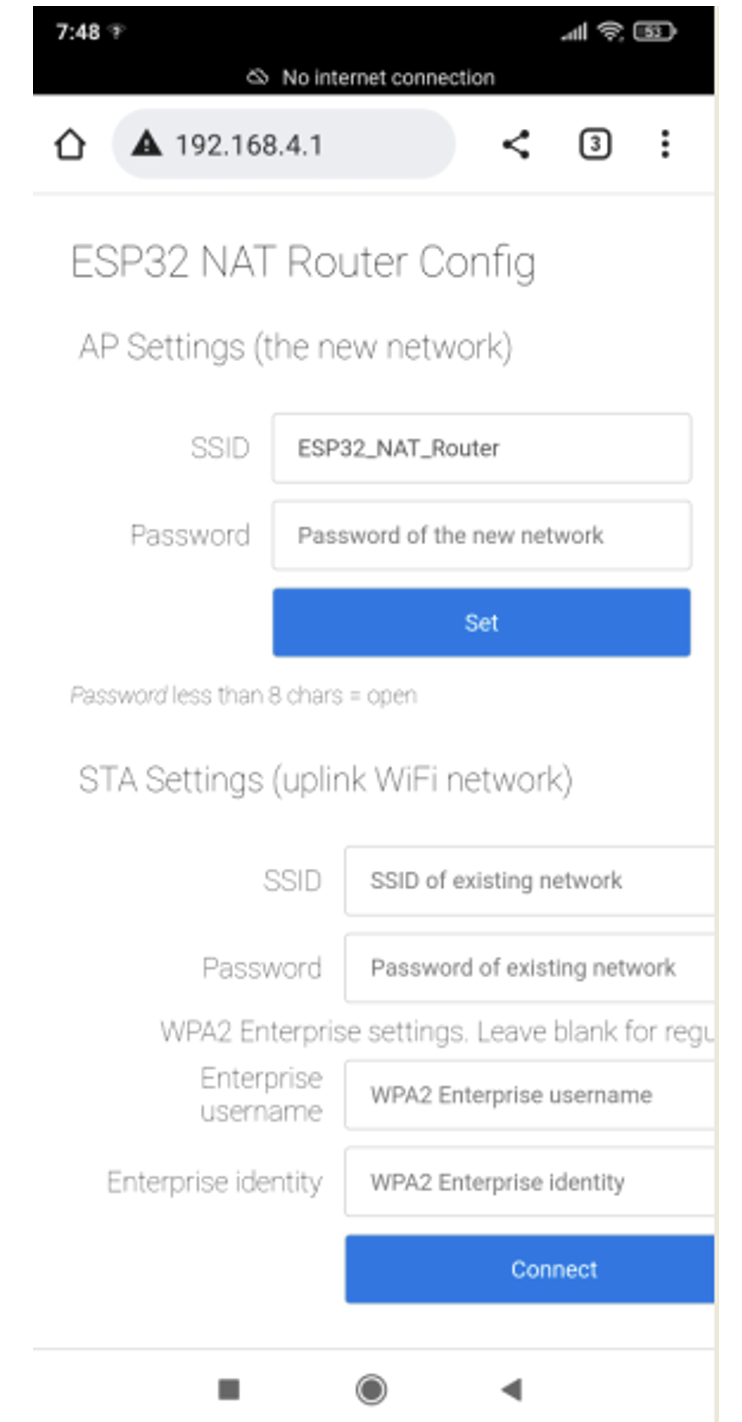
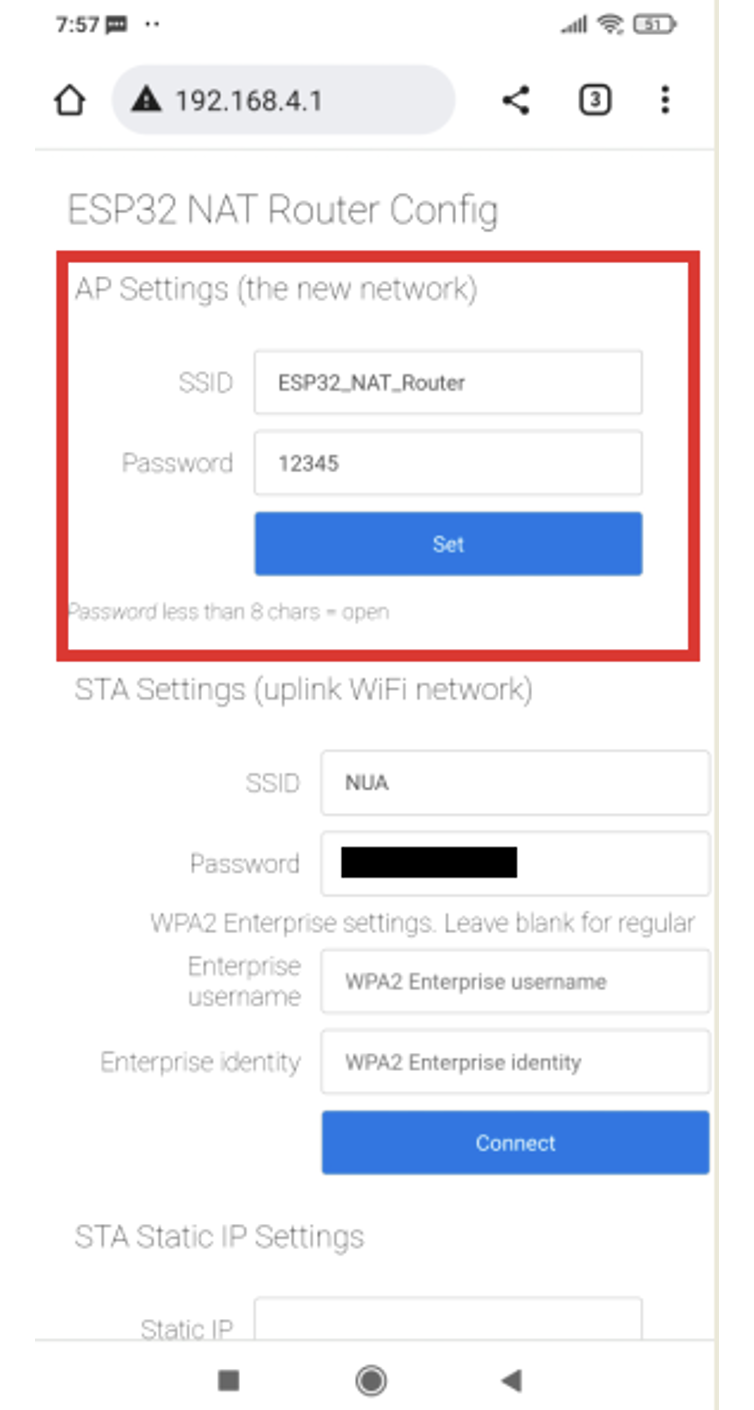
Next, open the browser and enter the following address: “http://192.168.4.1.” You should see the ESP32 NAT Router configuration page as shown below.
Under the STA settings, fill in the SSID and password of your existing WiFi network and tap the “Connect” button.
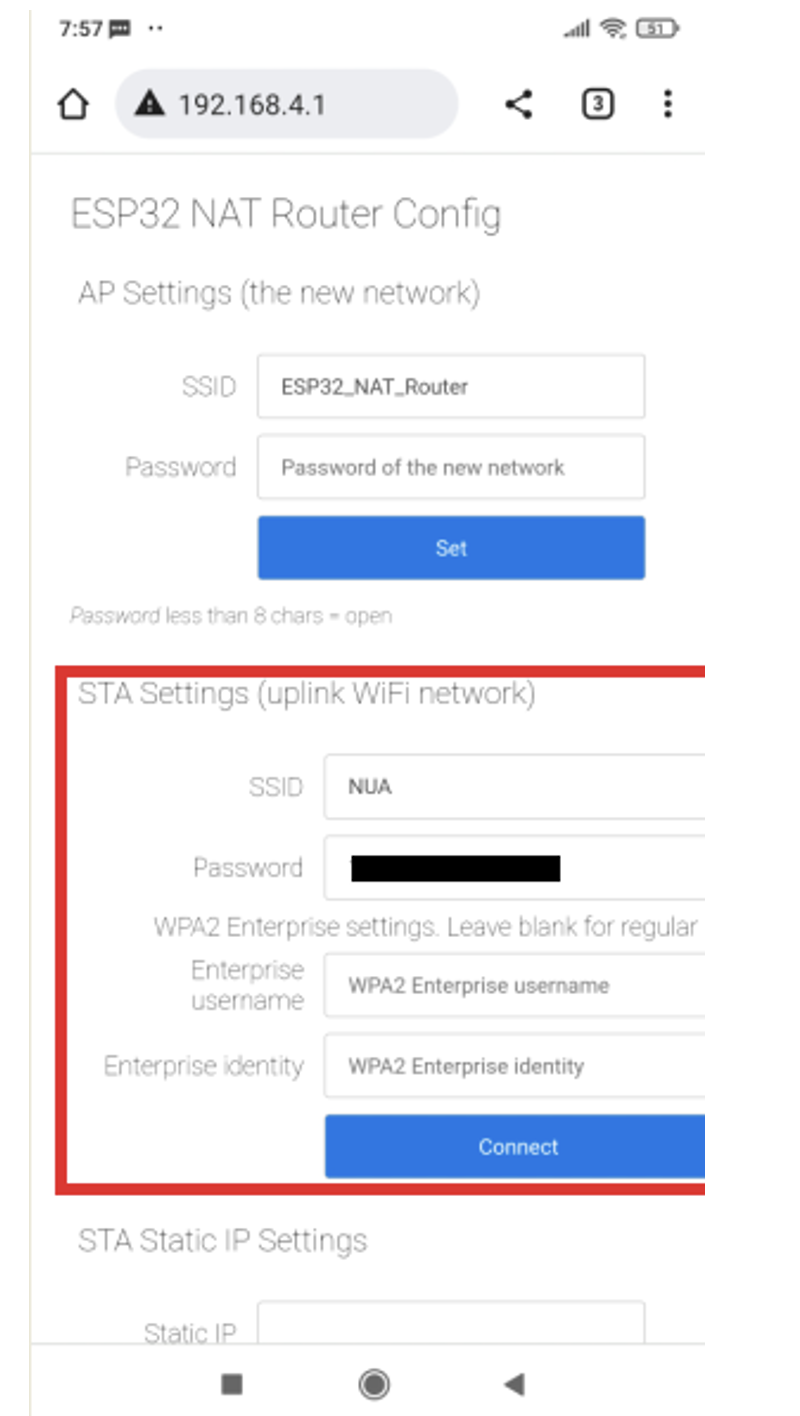
Under the STA settings, fill in the SSID and password of your existing WiFi network and tap the “Connect” button.
Under the “AP Settings,” set the SSID and password that you’d like to use for the ESP32 NAT router and then tap the “Set” button.
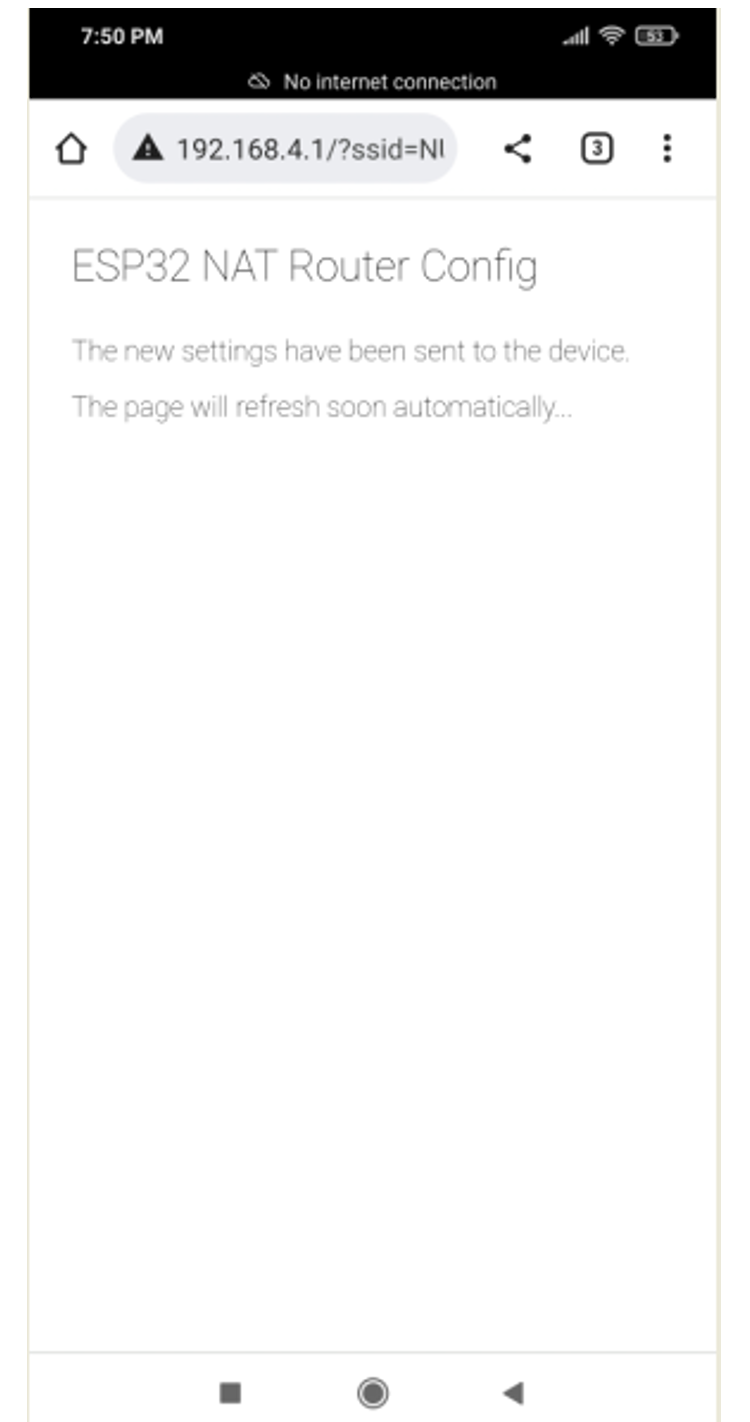
Restart the ESP32 board. You’ll see that the ESP32 NAT Router is available as a different WiFi network with access to the Internet.
Internet speed
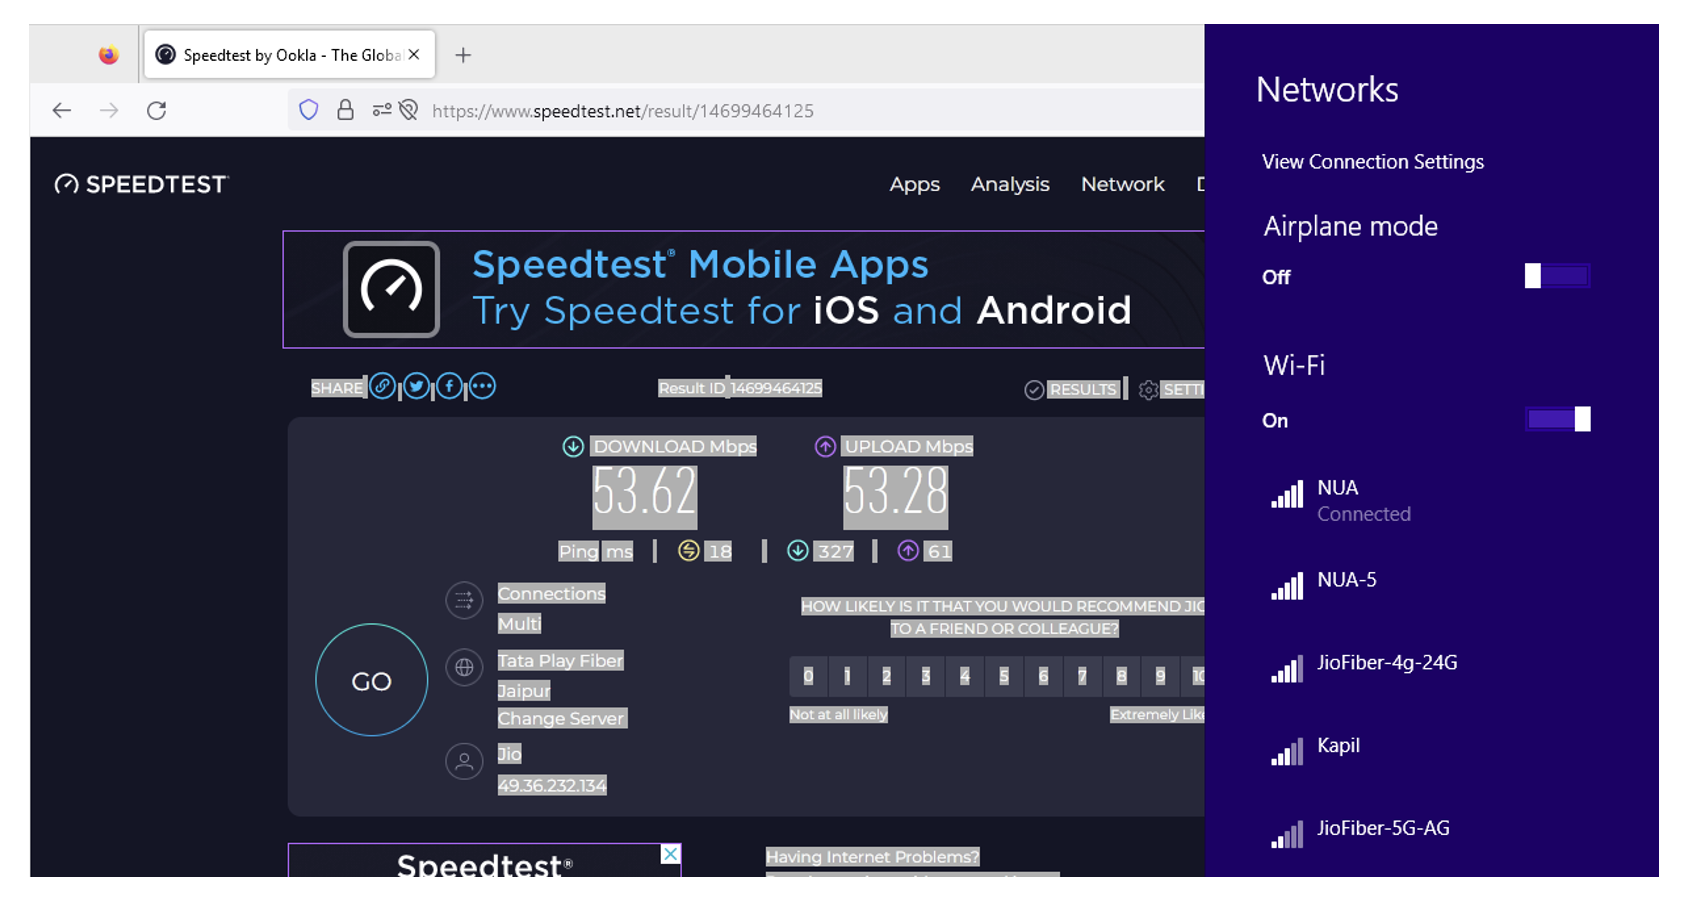
You can easily check the browsing speed delivered by the ESP32 WiFi repeater. Simply connect your computer or mobile to the WiFi network using the ESP32 repeater. Open your browser and conduct a speed test at speedtest.net.
For our WiFi network, the download speed from ESP32 WiFi repeater was 9.68 Mbps and the upload speed was 10.83 Mbps.
 When the original WiFi router was tested for browsing speed on speedtest.net, the download speed was 53.62 Mbps and the upload speed was 53.28 Mbps.
Conclusion
ESP32 or ESP8266 can easily be converted into a WiFi repeater by configuring it as a NAT router. Depending upon the network, the repeater can deliver more than 15 Mbps speed. It can be used as a separate network for guests or for smart home automation appliances. The repeater can also extend WiFi to other rooms or floors of a home or office, particularly where the primary WiFi signal is weak. Any mobile adaptor can power the ESP32 WiFi extender through a Micro-USB cable.
You may also like:


Filed Under: Electronic Projects, ESP8266, Tutorials, Wireless
I have attempted to build this using an ESP32-S3-WROOM-1-N4R2.
Rather than using a bought development board I started with a very basic home-made one using a ESP32-S3-WROOM–N4R2 with a native USB interface, which I used. I could not make it work using the instructions in the article.
I then tried to use an ESP-WROOM-32 development board with a CP2102 USB to UART programming input. That did not work, either. In both cases the programmer/upload software could not find the flash memory.
I do not understand what I am doing wrong and would welcome suggestions. Google is not yet my friend – the only texts which seem to address related problems are incomprehensible to me.
Hi, Thanks for writing to us. You can read more articles on http://www.engineersgarage.com
If you have any technical questions or need more information please visit our forums https://www.edaboard.com/ or https://www.electro-tech-online.com/.
Have a great day